

Enhancing the accessibility of your Moodle website helps more users access and interact with your content. This guide explains how to install the Barriano Accessibility Widget on your Moodle website.
Step 1: Register Your Moodle Website with Barriano
First, register your Moodle website with Barriano and complete the website registration process.
After registration, Barriano will generate a unique installation code for your website. Copy the code to your clipboard or save it in a text file so you can use it during installation.
If your Moodle website is already registered, sign in to your Barriano dashboard, select the relevant website, and copy its existing installation code.
If you have trouble signing in, use the password recovery option on the Barriano login page.
Step 2: Install the Barriano Widget on Moodle
Sign in to your Moodle administration panel.
From the top navigation menu, select Site Administration.
On the Site Administration page, select the Appearance tab.
Scroll through the available options and select Additional HTML.
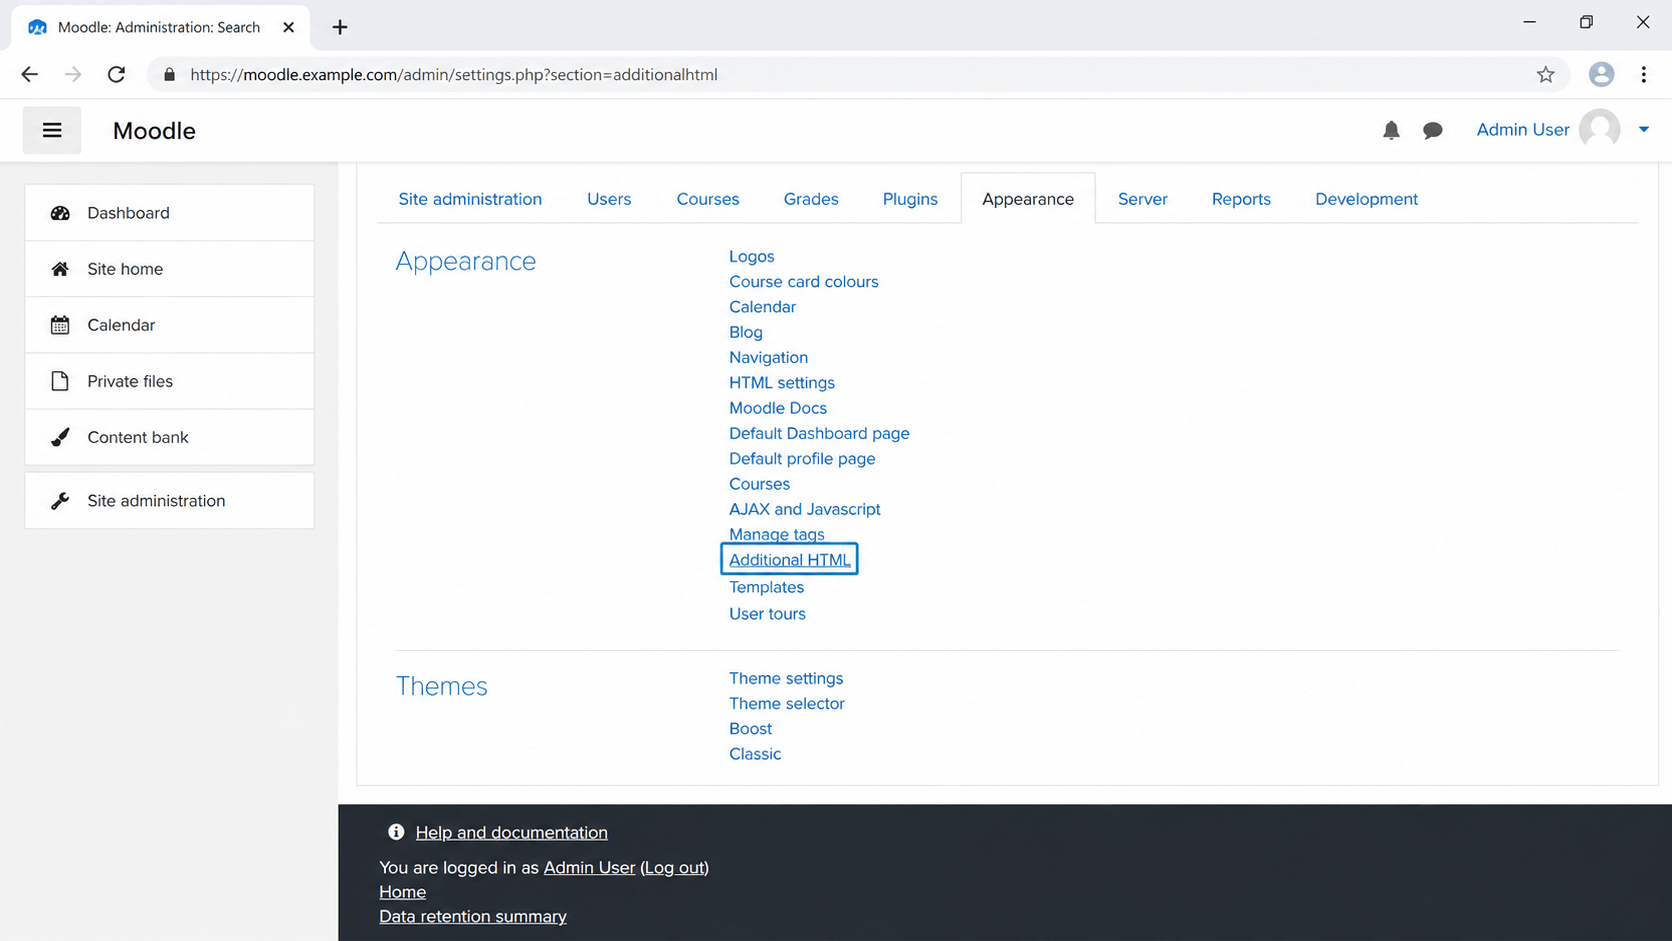
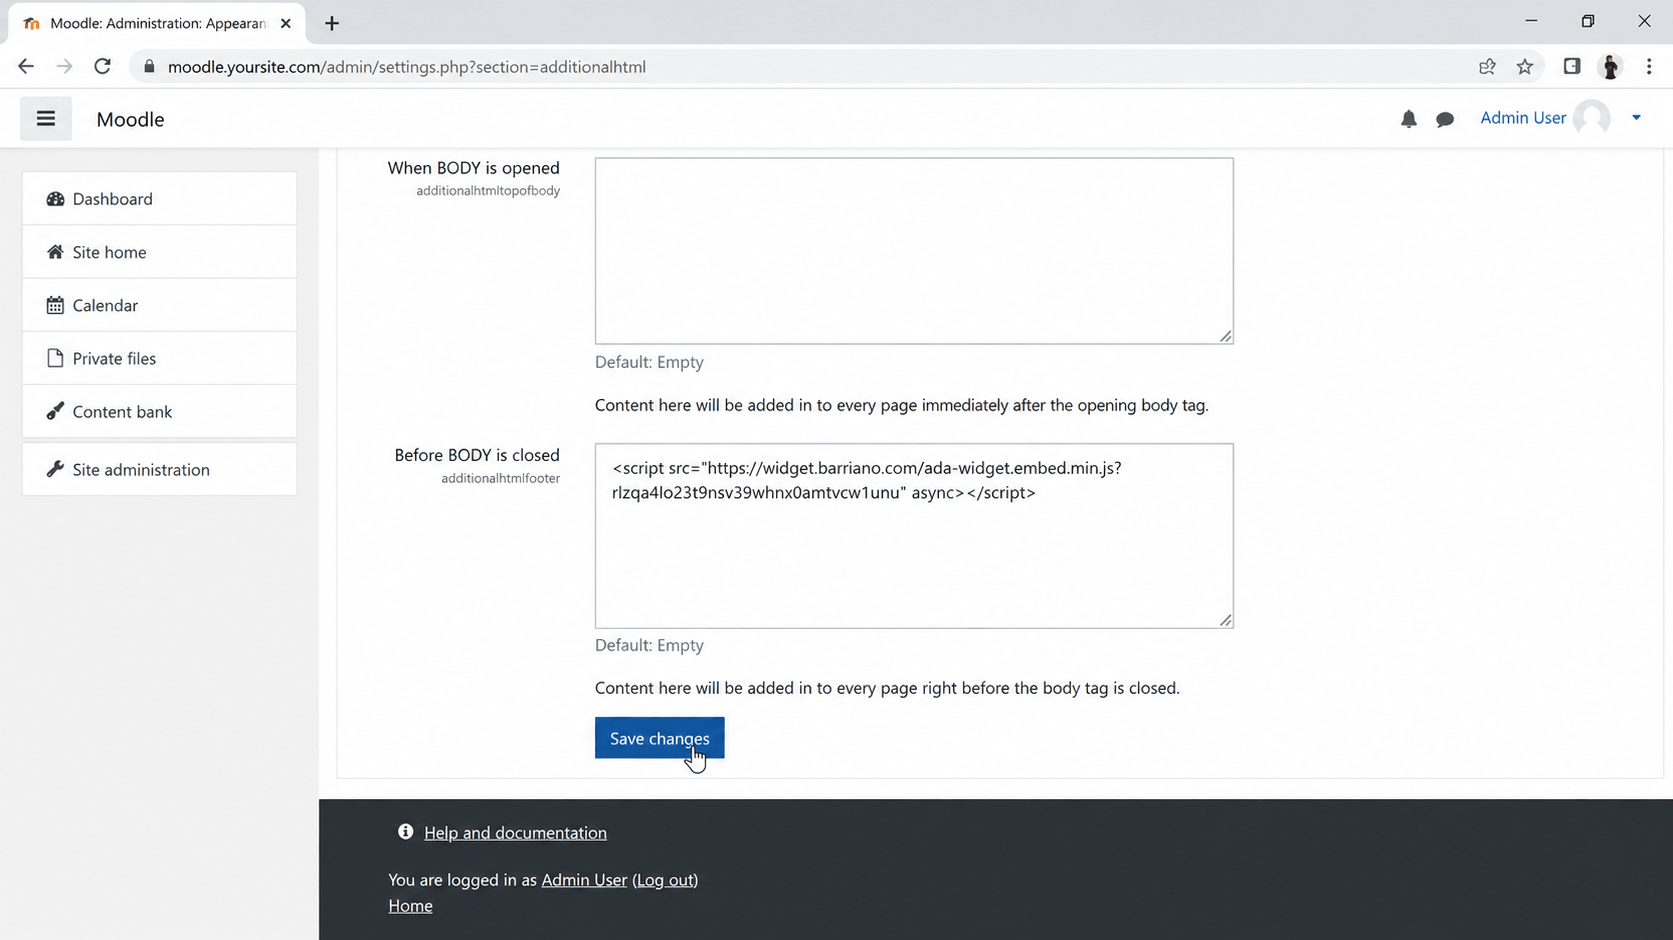
On the Additional HTML page, scroll down until you find the Before BODY is closed field.
Paste your unique Barriano installation code into this field.
Make sure the complete script is pasted without changing the script URL or removing the unique website key.
Click Save Changes below the field.
Step 3: Preview and Verify the Barriano Accessibility Widget
Open your Moodle website and confirm that the Barriano Accessibility Widget has been installed correctly.
Check that:
- The Barriano accessibility icon is visible.
- The widget opens when selected.
- The accessibility options work correctly.
- The widget appears on the required Moodle pages.
- The widget works correctly on desktop and mobile devices.
You’re all set! The Barriano Accessibility Widget is now installed on your Moodle website.